
- Introduction
- Setup
- Install pre-requisites
- Fork and clone the data definitions repository
- Set up pre-commit hooks
- Sync the repo
- Create a new branch
- Creating a new definition
- Decide what data to include in the definition
- Data we want to define
- Where do we create the definition?
- Initial setup of the definition file
- Defining the request
- Defining the simple fields of the response
- Defining the languages field in the response
- Defining the capital in the response
- The final definition
- Submitting the new definition
- Committing the new definition
- Push your branch to your fork in GitHub
- Create a pull request
- Wait for maintainers to merge it
- Next steps
How to create data definitions
Introduction
Data definitions are the technical specifications for data products, which are the cornerstone of interoperable and trusted data exchange through a Dataspace. To put it simply, data products are a standardized set of data contents that can be used in various different business processes and use cases.
A data product can for example describe the basic information of a company, transaction invoice or bill of lading (BoL) used in the logistics and financial processes in global trade. The data definition specifies what fields the data product contains, their meaning and type as well as limits and restrictions on them.
This guide is mostly focused on the technical aspect of creating the definitions and will try to give some general advice on creating a good and reusable definition. Please however note that for the best results the data definitions should always be created together with business functions or experts in the particular field to ensure the definitions are generic, reusable in various use cases and work for various different organizations.
Setup
Install pre-requisites
You will need to install all the pre-requisites listed below (the names link directly to installation instructions):
Fork and clone the data definitions repository
Go to the data definition repository on GitHub and create your own fork of the repository and clone it. It's important that you make a fork as you don't have write access to the repository.
Both of these steps are described in detail in the Fork a repo quickstart guide in the GitHub documentation.
Set up pre-commit hooks
Open the repository you cloned in a terminal and run pre-commit install to set up the pre-commit hooks.
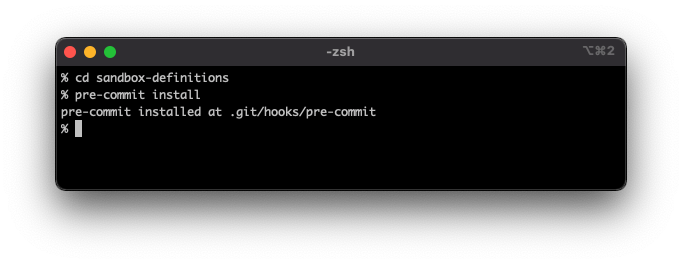
If you get any error at this stage, ensure you've properly installed pre-commit and Python.
The pre-commit hooks are used to perform some tasks at time you are committing your changes. They will for example generate an OpenAPI spec versions of the definitions based on the Python/pydantic ones, do some reformatting of the code and perform some validation.
Sync the repo
If you have cloned the repository earlier, ensure you sync the repo with the upstream and have the latest main checked out before you proceed to create the branch. If you just created the fork and cloned it (followed the steps above), you should have an up to date state already.
If you need help with syncing the repo from the upstream, check the Configuring Git to sync your fork with the upstream repository on GitHub.
Create a new branch
Create a new branch for your new definition, for example by running:
git checkout -b adding-my-definition
Creating a new definition
This guide explains how to create a new definition using a python file (with models based on the pydantic library). The content gets automatically converted into an OpenAPI spec file using the pre-commit hooks. This is fairly simple to do and understand even if you're not too familiar with Python or OpenAPI spec.
Decide what data to include in the definition
In this guide we're not giving any detailed information on what data to include in the definition or how to structure the data. Some basic principles to follow:
- The definition(s) should include the data you want to consume or provide.
- Try to make it generic, so it can be used by others, both others providing data or consuming data. In some cases it might be better to create multiple definitions rather than one that contains a lot of unrelated information that only apply to a particular use-case.
- Try to follow existing standards where possible (ISO etc).
- Use terminology and units that are commonly used in the field of application.
- Try to make sure the definition is consistent with other definitions if possible. For example prefer using same naming, units etc as similar data in other definitions.
- Prefer well structured and machine readable data that does not require any parsing. For example, don't define numeric data as a string with a unit (like "21 km"), rather as a numeric value and make sure to include the unit in the description of the field.
Data we want to define
For this guide, we are going to write a definition for some basic info for countries.
Note that the data here has been picked to make the definition somewhat short and varied, not to be generic and necessary useful for real use cases.
We have decided we want to include this data:
- Country code
- Name of the country
- Capital of the country, including the coordinates of it
- Official languages
- Area (in km^2)
Expressed in JSON, here is example data for Finland:
{
    "code": "FI",
    "name": "Finland",
    "capital": {
        "name": "Helsinki",
        "lat": 60.170833,
        "lon": 24.9375,
    },
    "languages": ["fi", "sv"],
    "area": 338455
}
and for Nauru:
{
    "code": "NR",
    "name": "Nauru",
    "capital": null,
    "languages": ["na", "en"],
    "area": 21
}
(Data source: Wikipedia)
In this simple example we have taken into account that there are countries that have no official capital, like Nauru, but we've ignored that there are countries that have multiple capitals. We could solve this by stating we're only interested in the legislative or administrative capital in these cases or defining the capitals as a list of cities and add properties about their kind.
We want the data to be requested by the country code, like this:
{
    "code": "FI"
}
Where do we create the definition?
Let's have a look at the structure of the definitions repository. At the root of the repository there is:
- src - contains a folder hierarchy with *.py files; the original sources for each definition.
- DataProducts - contains the OpenAPI spec version of each definition in *.json files in an identical folder structure. These files are automatically generated by the pre-commit hooks before you commit.
We'll use the src/Company/BasicInfo_v1.0.py as a base for our own definition. For the purpose of this guide we will store the new definition in src/test/ioxio-dataspace-guides/Country/BasicInfo.py.
Note: The test subfolder is reserved for experimenting with definitions. Each user is expected to create a subfolder inside it, with the same name as their GitHub username and then create any desired hierarchy of definitions under that. So this guide assumes we'd have a user account called ioxio-dataspace-guides and thus store the definition in test/ioxio-dataspace-guides.
Initial setup of the definition file
To get a quick start we will copy most of the content from the BasicInfo for companies.
Let's start by creating this simple initial version of the definition in src/test/ioxio-dataspace-guides/Country/BasicInfo.py:
from definition_tooling.converter import CamelCaseModel, DataProductDefinition
from pydantic import Field


class BasicCountryInfoRequest(CamelCaseModel):
    ...


class BasicCountryInfoResponse(CamelCaseModel):
    ...


DEFINITION = DataProductDefinition(
    version="0.0.1",
    title="Information about a country",
    description="Information about a country, such as name, capital, languages, area etc.",
    request=BasicCountryInfoRequest,
    response=BasicCountryInfoResponse,
)
This acts as a great template for any new definition you want to make. Let's go through the details of this a bit.
Lines 1-2 declare some imports. If you're unfamiliar with python, you don't really need to pay attention to these as long as you keep them there.
In the BasicCountryInfoRequest we'll define the input for the data source, and in the BasicCountryInfoResponse we'll define the output of the data source.
In the last section, we define the DEFINITION. The converter expects to find a variable with this name, that is an instance of the DataProductDefinition. In it we define a version number (for definitions in the test/UserName/ space it needs to be of the form 0.0.x), a title and description. We also specify that the BasicCountryInfoRequest class is the one defining the request (input) and BasicCountryInfoResponse the response (output).
Defining the request
At the simplest, we could define the request just like this:
class BasicCountryInfoRequest(CamelCaseModel):
    code: str
We define that there's one attribute/field, called code that is a string (str). The definition is done using python's type annotations.
However, this doesn't give any extra info about the parameter for anyone and doesn't impose any kind of validation on the length of it etc.
Pydantic has a class called Field, that can be used to define limits, default values etc. It can be used like this:
class BasicCountryInfoRequest(CamelCaseModel):
    code: str = Field(...)
The first argument to Field() is the default value of the field, which defaults to None in python (null in JSON). We don't want that, so we've set it to the special value ... (ellipsis), which tells pydantic that the field is required.
The end result of the two above examples are identical.
Let's now add a title, description and an example and min/max length to ensure it's a two letter code we get. This is done by simply adding some more keyword arguments to the Field(), like this:
class BasicCountryInfoRequest(CamelCaseModel):
    code: str = Field(
        ...,
        title="Code",
        description="ISO 3166-1 alpha-2 code for the country",
        example="FI",
    )
If we'd want, we could even add a regular expressions to check it's an uppercase string.
For more details on these parameters refer to the Field customization section of the documentation for pydantic.
Defining the simple fields of the response
Similarly to how we defined the fields in the request we'll define the simple fields in the response.
The definition for the code we can copy as-is from the request. The name we can define rather similarly; we don't need to set any minimum and maximum lengths for it. The area is also straight forward to define; we just need to specify it as a float.
class BasicCountryInfoResponse(CamelCaseModel):
    code: str = Field(
        ...,
        title="Code",
        description="ISO 3166-1 alpha-2 code for the country",
        example="FI",
        min_length=2,
        max_length=2,
    )
    name: str = Field(
        ...,
        title="Name",
        description="The name of the country",
        example="Finland",
    )
    area: float = Field(
        ...,
        title="Area",
        description="The area of the country in km^2",
        example=338455,
    )
Defining the languages field in the response
We wanted the official languages to be a list of strings. We'll need to import List for the type annotations, like this (at the top of the file):
from typing import List
Then we can define languages field using the type annotation languages: List[str] and again use the Field() to add a title, example etc.:
class BasicCountryInfoResponse(CamelCaseModel):
    ...
    languages: List[str] = Field(
        ...,
        title="Official languages",
        description="ISO 639-1 language codes for the official languages",
        example=["fi", "sv"],
        min_length=2,
        max_length=2,
    )
However, like this there would be no restriction on the length of the strings in the list. We can fix that by using a constrained type, in this case the constr. We need to import it like this (at the top of the file):
from pydantic import constr
Then we replace the str with constr(min_length=2, max_length=2), like this:
class BasicCountryInfoResponse(CamelCaseModel):
    ...
    languages: List[constr(min_length=2, max_length=2)] = Field(
        ...,
        title="Official languages",
        description="ISO 639-1 language codes for the official languages",
        example=["fi", "sv"],
    )
Defining the capital in the response
We wanted the capital to contain a sub object in the JSON response, something like this:
{
    "code": "FI",
    "name": "Finland",
    "capital": {
        "name": "Helsinki",
        "lat": 60.170833,
        "lon": 24.9375,
    },
    "languages": ["fi", "sv"],
    "area": 338455
}
To do this, we'll use Recursive Models in pydantic.
Let's start by defining this sub structure for the capital as a new Capital class. It looks like this, when we've filled in all titles, examples and limits:
class Capital(CamelCaseModel):
    name: str = Field(
        ...,
        title="Name",
        description="The name of the capital of the Country",
        example="Helsinki",
    )
    lat: float = Field(
        ...,
        title="Latitude",
        description="The latitude coordinate of the Capital",
        ge=-90.0,
        le=90.0,
        example=60.170833,
    )
    lon: float = Field(
        ...,
        title="Longitude",
        description="The longitude coordinate of the Capital",
        ge=-180.0,
        le=180.0,
        example=24.9375,
    )
The field definitions should be fairly similar to the earlier examples. We'll need to define this somewhere before our response class (BasicCountryInfoResponse) as we want to reference it inside it.
We add the capital to the BasicCountryInfoResponse, but this time we annotate it as a Capital, rather than a str, float or List, like this (see the last line):
class BasicCountryInfoResponse(CamelCaseModel):
    code: str = Field(...)
    name: str = Field(...)
    area: float = Field(...)
    languages: List[str] = Field(...)
    capital: Capital
However, right now, the capital would be a mandatory field in the response. But we wanted to also support countries that don't have a capital, like Nauru. Thus we need to modify this slightly. We'll need to import Optional from typing, so at the top we'll import both List and Optional from typing, like this:
from typing import List, Optional
Now we can change the type annotation to be Optional[Capital] like this:
class BasicCountryInfoResponse(CamelCaseModel):
    code: str = Field(...)
    name: str = Field(...)
    area: float = Field(...)
    languages: List[str] = Field(...)
    capital: Optional[Capital]
This allows the JSON response to have the capital set to null.
Further we want to add some more information about the capital, so we add a Field(). Note that this time, we set the default value to None (Python's variant of null) to mark it as optional, so it thus becomes:
class BasicCountryInfoResponse(CamelCaseModel):
    code: str = Field(...)
    name: str = Field(...)
    area: float = Field(...)
    languages: List[str] = Field(...)
    capital: Optional[Capital] = Field(
        None,
        title="Capital",
        description="The capital of the country, legislative if multiple",
    )
The final definition
If you've followed along the guide so far, the Country/BasicInfo.py file should now look like this in it's entirety:
from typing import List, Optional

from definition_tooling.converter import CamelCaseModel, DataProductDefinition
from pydantic import Field, constr


class BasicCountryInfoRequest(CamelCaseModel):
    code: str = Field(
        ...,
        title="Code",
        description="ISO 3166-1 alpha-2 code for the country",
        example="FI",
        min_length=2,
        max_length=2,
    )


class Capital(CamelCaseModel):
    name: str = Field(
        ...,
        title="Name",
        description="The name of the capital of the Country",
        example="Helsinki",
    )
    lat: float = Field(
        ...,
        title="Latitude",
        description="The latitude coordinate of the Capital",
        ge=-90.0,
        le=90.0,
        example=60.170833,
    )
    lon: float = Field(
        ...,
        title="Longitude",
        description="The longitude coordinate of the Capital",
        ge=-180.0,
        le=180.0,
        example=24.9375,
    )


class BasicCountryInfoResponse(CamelCaseModel):
    code: str = Field(
        ...,
        title="Code",
        description="ISO 3166-1 alpha-2 code for the country",
        example="FI",
        min_length=2,
        max_length=2,
    )
    name: str = Field(
        ...,
        title="Name",
        description="The name of the country",
        example="Finland",
    )
    area: float = Field(
        ...,
        title="Area",
        description="The area of the country in km^2",
        example=338455,
    )
    languages: List[constr(min_length=2, max_length=2)] = Field(
        ...,
        title="Official languages",
        description="ISO 639-1 language codes for the official languages",
        example=["fi", "sv"],
    )
    capital: Optional[Capital] = Field(
        None,
        title="Capital",
        description="The capital of the country, legislative if multiple",
    )


DEFINITION = DataProductDefinition(
    version="0.0.1",
    title="Information about a country",
    description="Information about a country, such as name, capital, languages, area etc.",
    request=BasicCountryInfoRequest,
    response=BasicCountryInfoResponse,
)
Submitting the new definition
Committing the new definition
We'll need to commit the new definition; the pre-commit hooks will take care of generating the OpenAPI spec from the python file. Let's go back to the command line and ensure we're in the root of the repository we cloned.
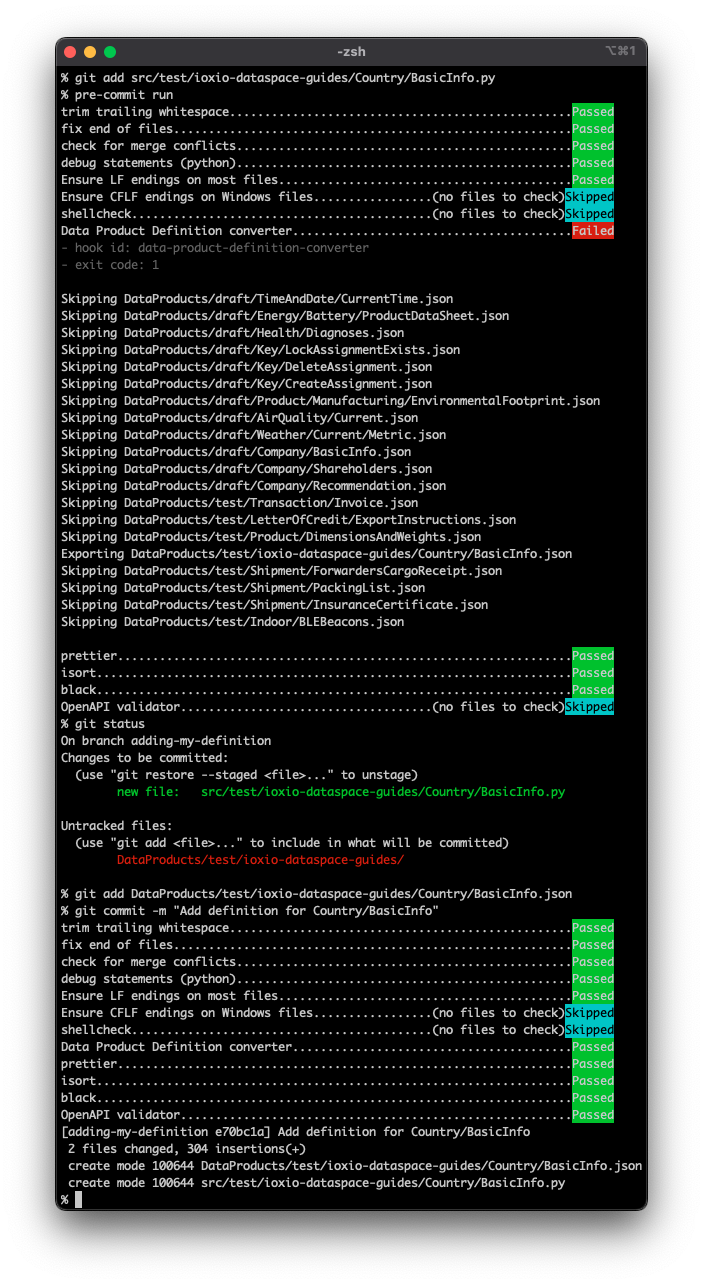
Let's add the new definition file to it and run the pre-commit hooks to see that it creates the OpenAPI spec file. Then let's add the OpenAPI spec file and commit it. Note that you might get some changes to the BasicInfo.py file due to the black pre-commit hook reformatting it slightly. In that case, you'll also need to add that file again before you'll be able to commit.
Here are the commands you should need to run:
git add src/test/ioxio-dataspace-guides/Country/BasicInfo.py
pre-commit run
git status
git add DataProducts/test/ioxio-dataspace-guides/Country/BasicInfo.json
git commit -m "Add definition for Country/BasicInfo"
And this is what it will likely look like when you run the commands:
Push your branch to your fork in GitHub
Depending a bit on how you cloned your repository, you should be able to push your branch by running:
git push --set-upstream origin adding-my-definition
In case you need further assistance with pushing the branch, see the GitHub documentation on pushing commits to a remote repository.
Create a pull request
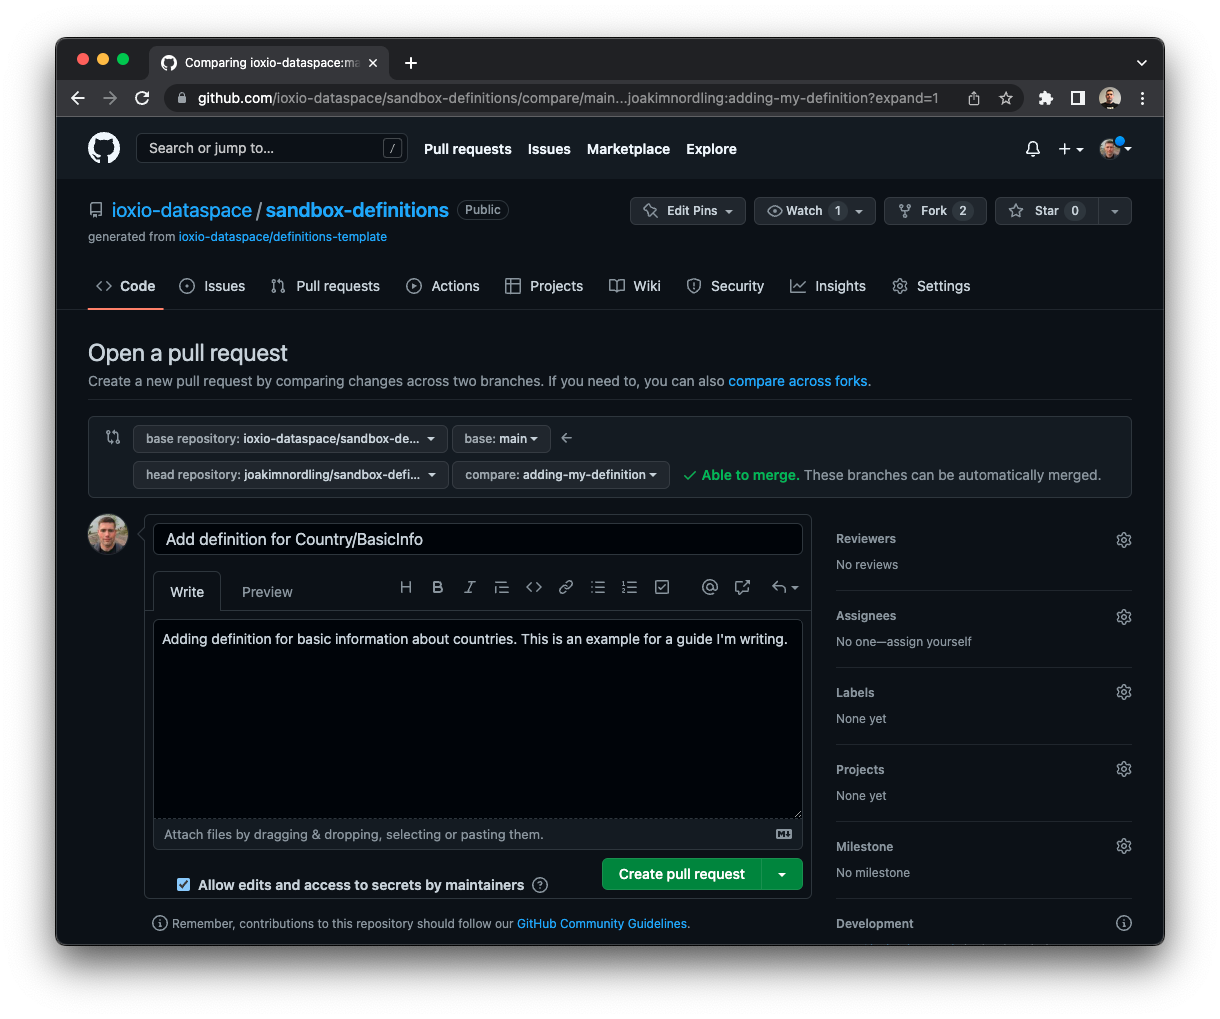
Create a pull request to the definition repository on GitHub from the branch you just created in your own fork of the repository.
See Creating a pull request in the GitHub documentation if you need more assistance with creating the pull request.
The flow should look pretty much like this:
Wait for maintainers to merge it
The next step is to just wait for maintainers to accept and merge the pull request. In some cases the maintainers might also ask for adjustments or reject the pull request. Please follow the updates posted on the pull request.
Next steps
Once the definition has been merged you can start using it in data sources, for that you might want to check out the How to build a data source guide.
If you spot things you want to change in the definition you can submit a pull request with changes to your own definition. You can optionally increment the version number of the definition each time; i.e. to 0.0.2, 0.0.3 etc.
Once you've tested the definition and are somewhat happy with it and think it could be tested in a broader scope by others, you can submit a pull request to move it out of the test/UserName/ scope. Note that at this stage you will have to increment the version number to at least 0.1.0 and also add the corresponding version number (two digit version only) to the filename, so the full path and name for this example would then become src/Country/BasicInfo_v0.1.py. You can read more about this in the versioning of definitions section of the contribution guidelines.