
Use login portal in your application
Introduction
The login portals on the IOXIO Dataspaces are used to provide a unified way for users to log in to various different applications created by different vendors on the same Dataspace. The authentication is additionally used in the consent portal to grant consents and together with that in the product gateway and data sources or productizers to verify both authorization and consent when needed. This guide will focus on how you can use the login portal to authenticate your users.
Technical details
The login portal is acting as both an OpenID Connect identity providers (IDP) towards applications published on the Dataspace and as a relying party (RP) towards one or more 3rd party IDPs that might vary depending on the Dataspace. In essence it's acting a middle man for all the authentication on the Dataspace.
This means applications built for an IOXIO Dataspace in the typical case only need to integrate with the login portal, and not the underlying authentication providers. This also means the login portal can be extended with support for other authentication schemes while still allowing the applications on the Dataspace to use the same OpenID Connect authentication.
Using the login portal for authentication
The login portal uses OpenID Connect with the code flow. You will need to decide how you are going to implement the OpenID Connect code flow for your application; you can either use some ready-made library or implement it yourself.
For a really simple example of how the code flow authentication can be built, you can have a look at the codebase for the My Company Consent demo application. It's lacking a lot of cleanup related things, but should be enough to show how you could build it.
OpenID Configurations
The login portal supports the OpenID Connect Discovery, thus most relevant configurations for OpenID Connect clients can be found at the path /.well-known/openid-configuration, for example on the sandbox at the address https://login.sandbox.ioxio-dataspace.com/.well-known/openid-configuration.
The content looks like this:
{
  "issuer": "https://login.sandbox.ioxio-dataspace.com",
  "authorization_endpoint": "https://login.sandbox.ioxio-dataspace.com/start-login",
  "token_endpoint": "https://login.sandbox.ioxio-dataspace.com/api/oauth/token",
  "jwks_uri": "https://login.sandbox.ioxio-dataspace.com/api/oauth/jwks",
  "userinfo_endpoint": "https://login.sandbox.ioxio-dataspace.com/api/oauth/userinfo",
  "end_session_endpoint": "https://login.sandbox.ioxio-dataspace.com/end-session",
  "response_types_supported": [
    "code"
  ],
  "subject_types_supported": [
    "public"
  ],
  "id_token_signing_alg_values_supported": [
    "RS256"
  ]
}
Many OpenID Connect/OAuth 2 clients require some of these endpoints directly instead of parsing them from the configuration using the discovery mechanisms.
Register your application in the developer portal
You will need to register your application through the developer portal to get a Client ID and Client Secret.
1. Login in to the Developer portal.
2. Go to the My Applications page in the menu.
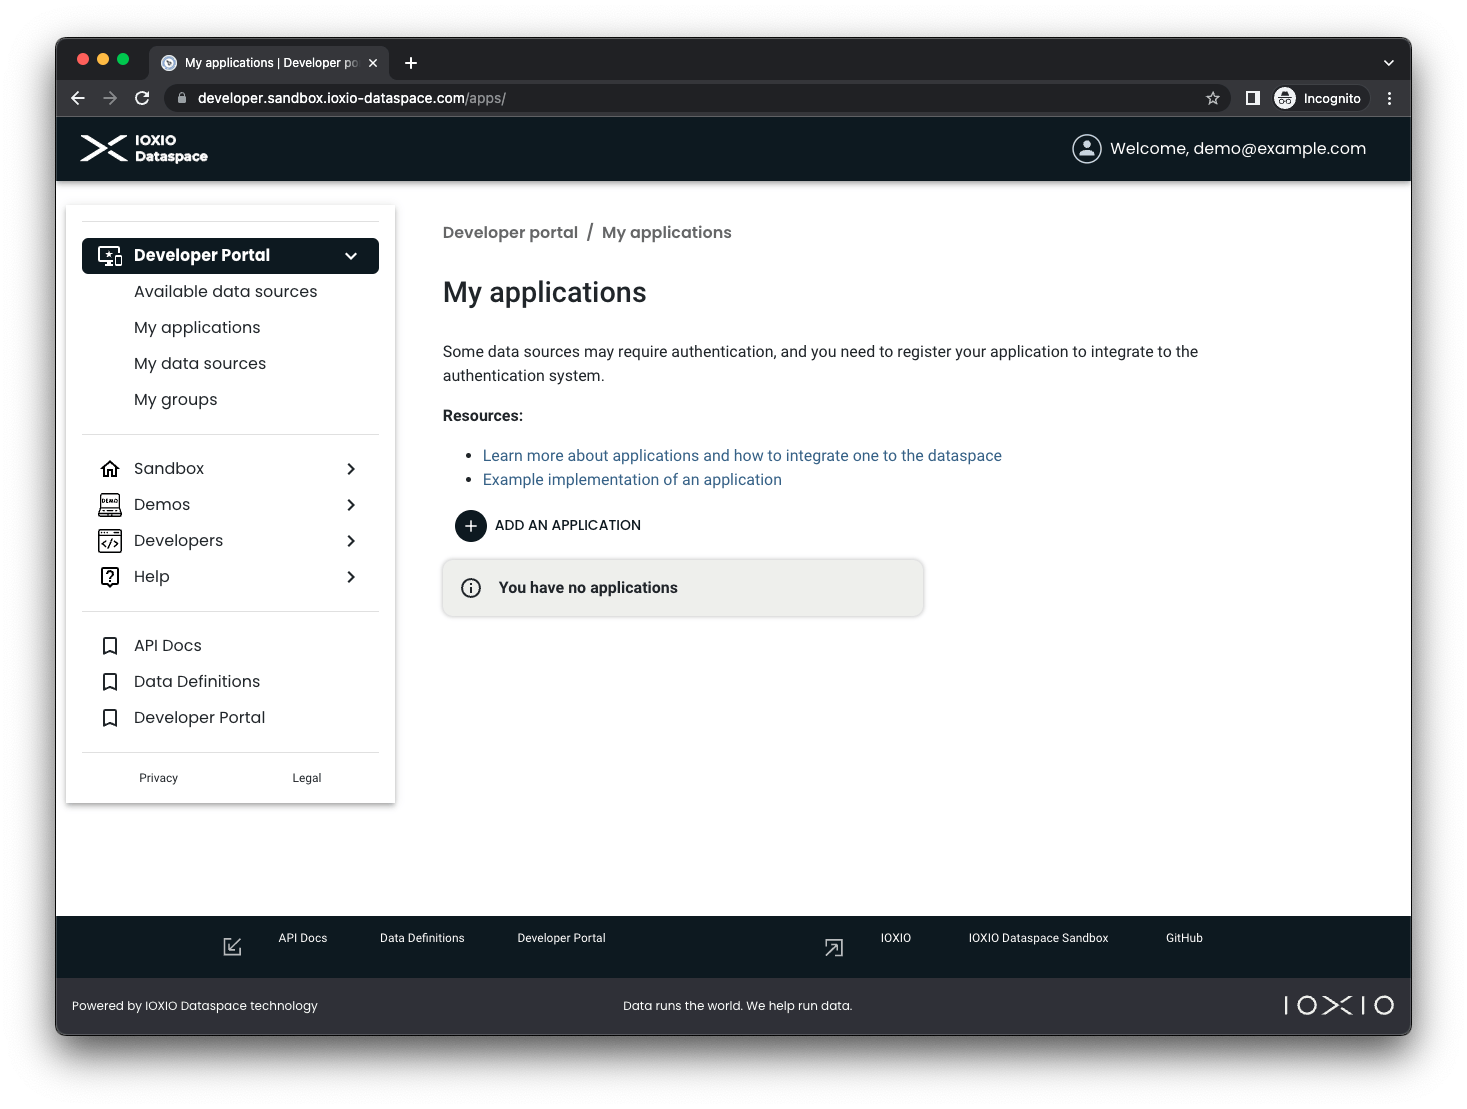
3. Press the + ADD AN APPLICATION button.
4. Fill in the necessary details for your application:
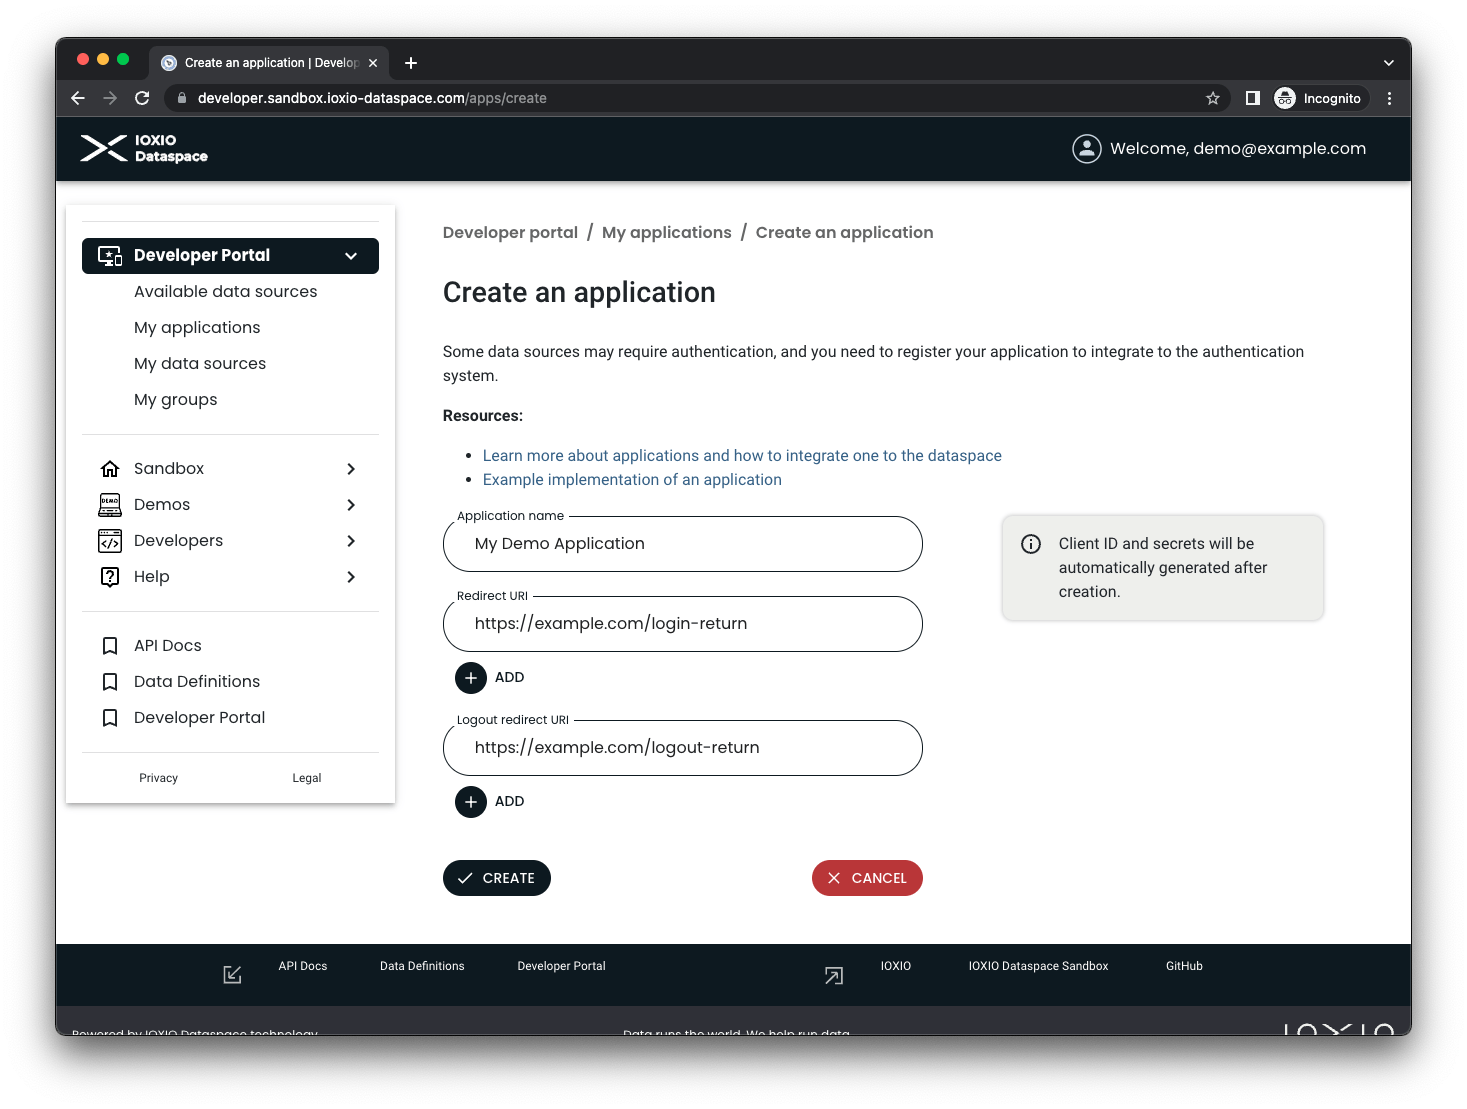
Pick a name for your own application and fill it in the Application name field.
Add a Redirect URI for your application, as well as a Logout Redirect URI. These are the addresses the user is allowed to be redirected to when being returned to your application.
5. Create the application by pressing the CREATE button.
6. Your application is now created.
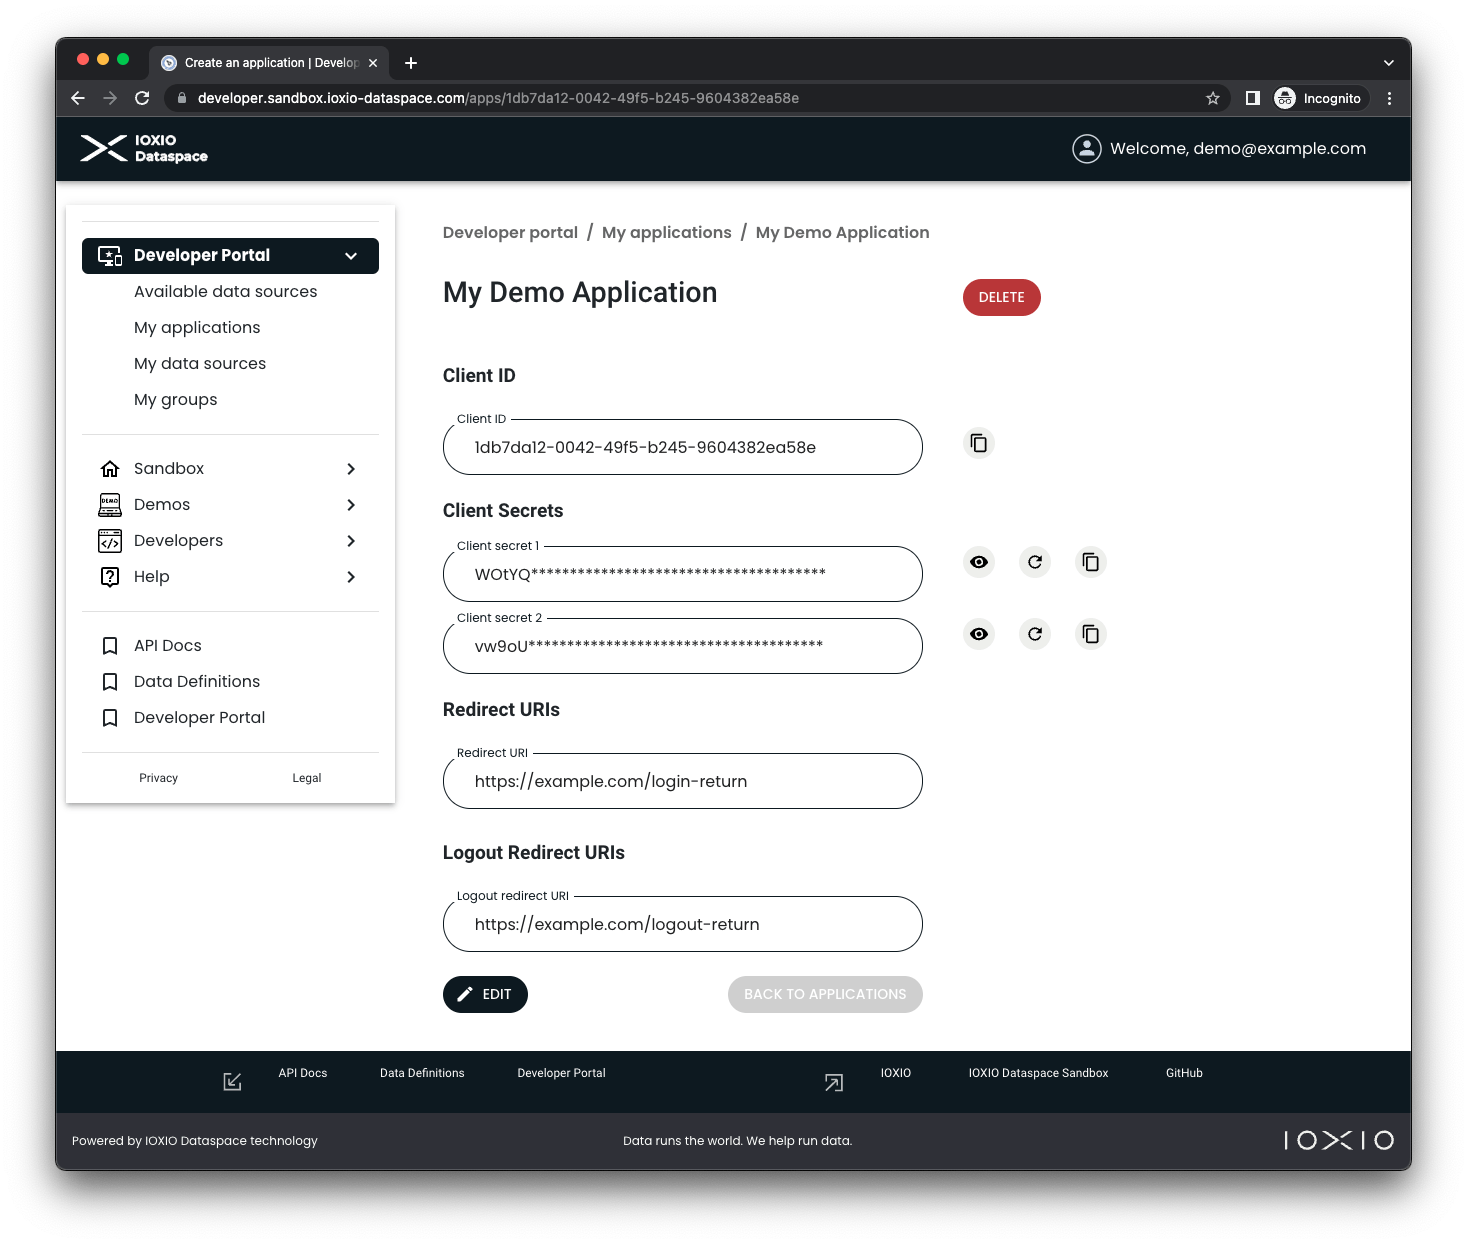
As part of creating it, a Client ID was generated, as well as two client secrets (so you can use one and rotate the other one). You will need the Client ID and either one of the two Client Secrets when setting up your application. The buttons next to the client secrets allows you to show them, copy them and replace them. In case you need to edit any of the URIs or the name of the app you can press the EDIT button.
Other configurations
Scopes
At the moment the only supported scope is openid and it is required.
ACR Values
The acr_values is required and used to indicate which underlying authentication method the login portal will use for the authentication. For applications registered on the sandbox Dataspace, the value fake-auth is the only supported one and will use a fake authentication where the user can fill in any username that will be postfixed with a faked domain to form a fake-email address and no password. Please consult your Dataspace specific details for which values are supported in your Dataspace if you're creating an application for another Dataspace.
ID Token Hint
When logging out the user the application must include the id_token_hint when redirecting the user to the end_session_endpoint.